Handmade objects carry stories in their textures, proportions, and finishes. The right images don’t just show a product; they translate touch, weight, and craftsmanship into a visual language that customers can feel on any screen. For makers of jewelry, watches, ceramics, textiles, and accessories, product photography is the bridge between the studio bench and the buyer’s imagination. When done well, it preserves honesty while elevating perceived value, shortens the path to purchase, and supports a consistent brand presence across e-commerce, social, and print. The goal is simple: render the soul of the piece faithfully, then present it in a way that’s irresistible.
Crafting Light and Detail: Techniques That Honour the Handmade
The foundation of excellent product photography for artisans is controlled light. Soft, directional lighting preserves form and texture without washing out detail. For metals and glossy glazes, use broad diffusion—softboxes, scrims, or a light tent—to wrap light around contours while reducing harsh speculars. Position flags or black cards near the subject to sculpt edges and add separation; this is especially useful for polished silver or watch cases that can disappear against light backgrounds. For textiles or matte clay, a single key light with fill can highlight weave, grain, or hand-thrown spirals, bringing character to the surface.
Reflections make or break images of jewelry and watches. Instead of fighting them, design them. Angle lights to create clean gradients across metal and position white or black reflectors where you want highlights or contrast. A circular polarizer on the lens cuts glare from varnished wood or resin; cross-polarization (polarizing gels on lights plus a lens polarizer) can tame the brightest hotspots while retaining color depth. Remember that reflections show whatever the product “sees,” so keep the studio uncluttered and use large, simplified shapers to craft elegant reflections.
Detail requires optical precision. Macro lenses (60–105mm) provide sharpness and minimal distortion. For small pieces with shallow depth of field, focus stacking blends multiple focus planes into a single, tack-sharp image—critical for gemstones, engraving, and tiny findings. Shoot tethered when possible; on-screen review catches dust, fingerprints, and misaligned clasps before they become retouching marathons. Keep lenses, pieces, and sets impeccably clean; compressed air, microfiber cloths, and a jeweler’s loupe save hours later.
Color fidelity is non-negotiable, particularly for gemstones, patinas, or specialty glazes. White-balance with a gray card at the start of each setup and create custom camera profiles if color-critical work is routine. Neutral, repeatable backgrounds (pure white, soft gray, or subtle paper tones) keep attention on the piece and deliver consistency across SKUs. For marketplaces that require “true white,” expose slightly brighter but guard against clipping; a calibrated workflow maintains both brilliance and accuracy. In short, let light reveal the hand of the maker, and let technique stay invisible.
From Packshots to Storytelling: Building a Cohesive Visual Language
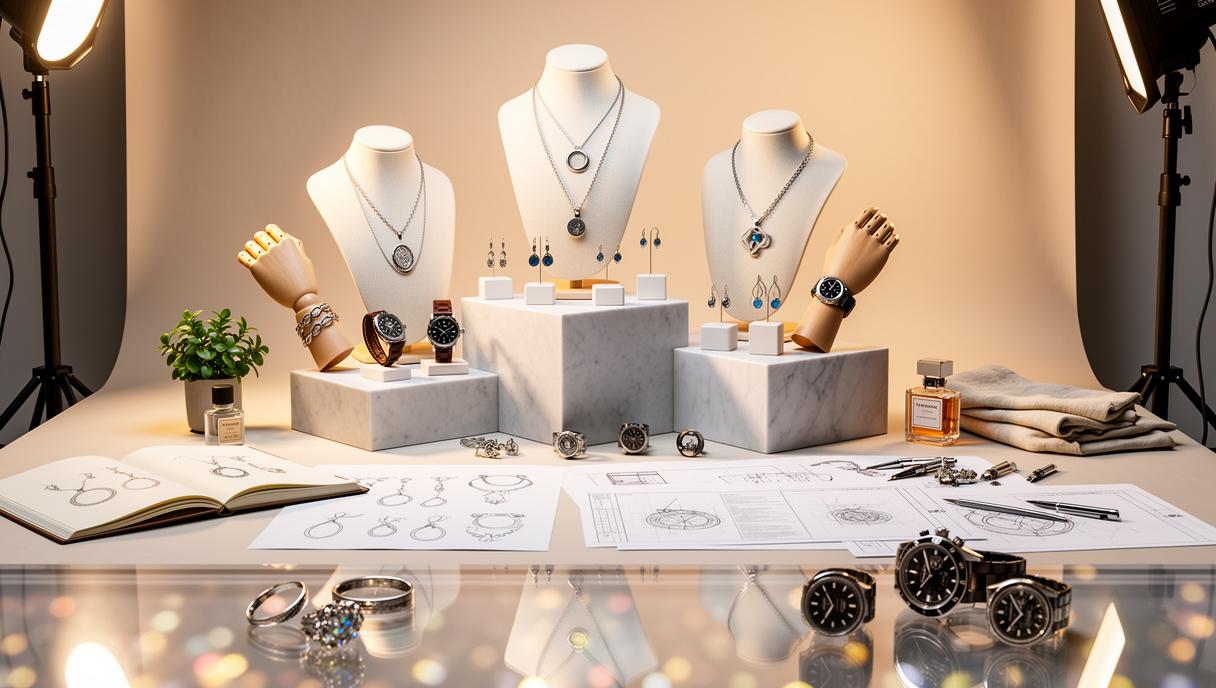
Artisans need two visual modes: precise packshots and evocative lifestyle images. Packshots are the spine of e-commerce. Shot straight-on or at a slight three-quarter angle, they communicate scale, finish, and function without distraction. Aim for consistency—same angle, same background, same shadow density—so browsing feels calmer and more premium. Provide multiple angles, macro details, and in-context scale references (a clasp with a coin, a ring next to a ruler) when measurements alone won’t suffice. On white, a gentle natural shadow grounds objects; on darker backgrounds, a subtle gradient or rim light maintains dimensionality.
Storytelling images move hearts. Lifestyle compositions place the object in a believable scene that reflects the brand’s values. A hand-loomed scarf draped over a wooden chair near morning light; a ceramic cup with steam curling beside a sketchbook; a timepiece on a wrist amid tools at a workbench—each scenario anchors the product in daily ritual and craft authenticity. Choose props that relate to material and process, not just aesthetics. Tools, raw materials, and in-progress elements honor the maker without stealing the show. Compose with negative space for copy, apply the rule of thirds for balance, and align lines (table edges, wrists, or straps) to guide the eye naturally to the hero object.
Across channels, maintain a cohesive visual language. Decide on a color palette (backgrounds, props, skin tones for on-model shots), a contrast profile, and a signature lighting style. Ensure images scale: 2K or 4K masters downsample beautifully for web, reels, and email, while retaining detail for print lookbooks and packaging. Include accessibility details—alt text that describes material and design—improving SEO and inclusivity. When expanding quickly, modern tools can help bridge craft and scale. With platforms that turn sketches, CAD, or product shots into polished visuals—packshots, lifestyle sets, and on-model compositions—artisans can produce campaign-ready assets without booking a traditional studio every time. For inspiration and practical workflows tailored to makers, explore Product photography for artisans to see how design-to-image pipelines compress timelines while protecting authenticity.
Efficient Workflow and Scaling Quality on a Maker’s Budget
Great images are the output of a calm, repeatable process. Start with a shot plan: for each SKU, list essential views (front, back, angle, clasp/closure, scale-on-body), required detail crops, and any lifestyle scenarios that convey use or emotion. Group similar items together so lighting and camera settings change minimally. Build a simple set template: camera height, focal length, subject distance, and light positions measured and recorded. Mark stands and tabletops with tape; consistency saves hours and builds a premium catalog feel.
Time is a scarce resource for makers. Tether to a laptop and create a pre-flight checklist: sensor clean, batteries, white balance, grey card test, dust inspection with a loupe, and a naming convention that encodes SKU, colorway, and angle. Keep a caddy of essentials—wax, museum putty, invisible fishing line, articulated arms—for floating earrings, stabilizing rings upright, or shaping a ribbon without retouch elasticity. For reflective products, keep acetate gloves nearby to avoid fingerprints between angles.
Retouching should be corrective, not transformative. Remove dust, balance exposure, straighten horizons, and preserve honest texture. For gemstones, enhance brilliance while protecting true hue; avoid over-saturation that misrepresents color. Non-destructive workflows (layers, masks, RAW edits) enable quick batch adjustments. Export master files at high resolution, then generate derivatives for web, marketplace requirements, and social. Maintain a digital asset library with versioning and tags: material, finish, collection, and season. This structure makes it easy to refresh campaigns, assemble lookbooks, and support press requests without starting from scratch.
When scale spikes—wholesale orders, seasonal drops, or collaborations—hybrid production keeps quality steady. Use a small in-house setup for straightforward packshots and lean on AI-powered scenes for rapid lifestyle and on-model variations that match brand rules. Virtual sets let you iterate background, time of day, or surface choice without rebuilding. Drag-and-drop studios with smart editing features accelerate testing: try a walnut tabletop versus marble, adjust reflections on gold versus steel, or mock up on-wrist watch images that respect lug-to-lug proportions and strap taper. For ceramics or textiles, simulate daylight windows and soft falloff to honor fiber and glaze, then validate with a few physical test shots to ensure alignment with reality.
Real-world example: a jeweler launching a 12-piece capsule needs e-commerce images, a hero lifestyle, and two on-model looks per SKU—over 60 assets in a week. The shot plan consolidates by finish (silver first, then gold) to minimize lighting changes; a macro stack captures prong details; a calibrated profile preserves emerald color. Packshots are captured in-house over two days. Meanwhile, virtual scenes generate complementary lifestyle contexts—a linen vanity, a travel case, and an urban bookshelf vignette—plus on-model crops sized for marketplace thumbnails and social stories. Final QC checks ensure metal reflections read as intentional gradients, chain lay is natural, and shadows match the chosen time-of-day mood. The result: consistent, studio-quality visuals that feel handcrafted, produced at a pace that matches modern retail without compromising the maker’s voice.
Ultimately, the north star of product photography for artisans is respect: for material, for process, and for the buyer’s trust. Thoughtful lighting, a cohesive visual language, and a lean, scalable workflow let every image carry the same integrity as the object itself—so the craft shines through, online and in hand.
Casablanca chemist turned Montréal kombucha brewer. Khadija writes on fermentation science, Quebec winter cycling, and Moroccan Andalusian music history. She ages batches in reclaimed maple barrels and blogs tasting notes like wine poetry.